 Ovobrowser
Team members and permission management
"Team Management" is used to manage member seats, personal profile limits and fine-grained permissions. Member business data is isolated by ownership by default, and team owners can view and manage team-wide data.
Team members and permission management
"Team Management" is used to manage member seats, personal profile limits and fine-grained permissions. Member business data is isolated by ownership by default, and team owners can view and manage team-wide data.
Confirm before you start
Only accounts with corresponding permissions can enter team management;
Team seats and profile quota must be available;
At least one assignable role is required before creating a member;
Permissions take effect immediately after being saved;
The owner role has full team permissions and is always enabled.
1. Overview of member management
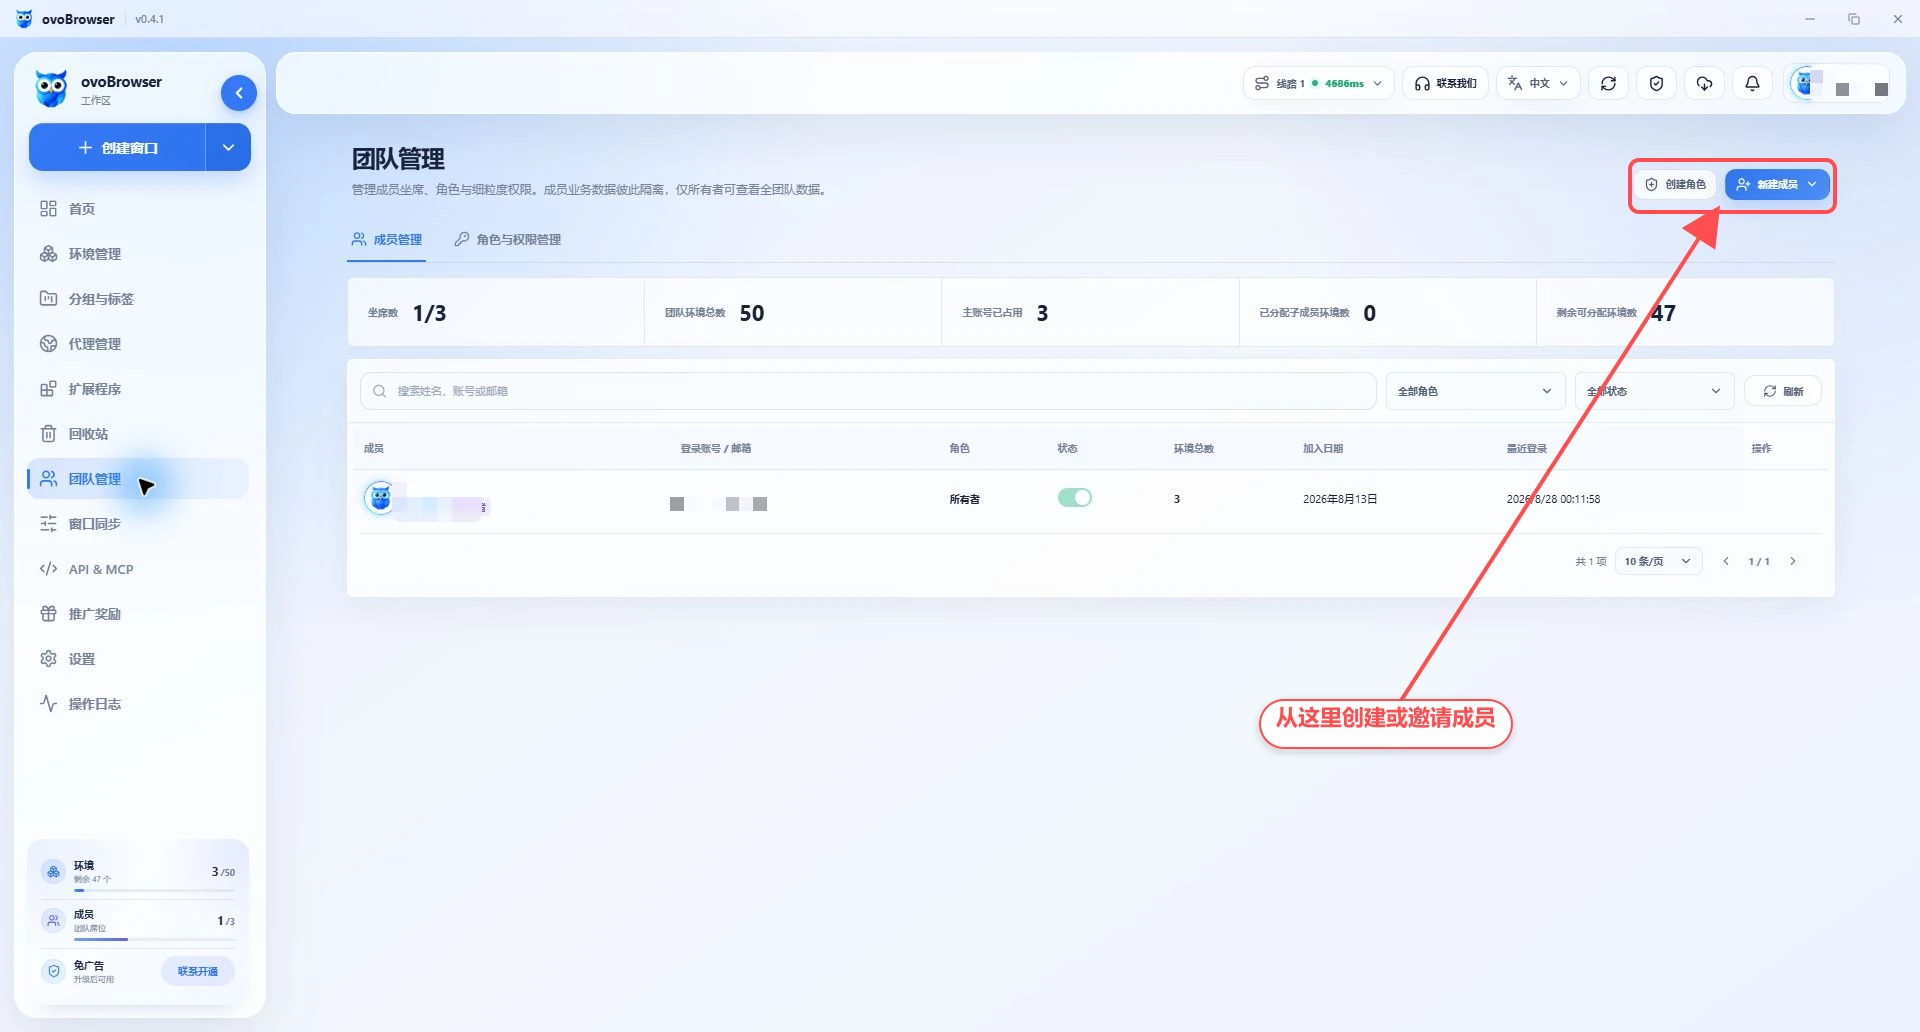
The page will display:
Number of seats;
Total number of team profiles;
The number of occupied master accounts;
Number of assigned child member profiles;
The number of remaining allocable profiles;
Member name, login account or email, role, status, total number of profiles, date of joining and latest login.
Members can be filtered by role, status, and keywords.
2. Directly create a member account
Click "New Member";
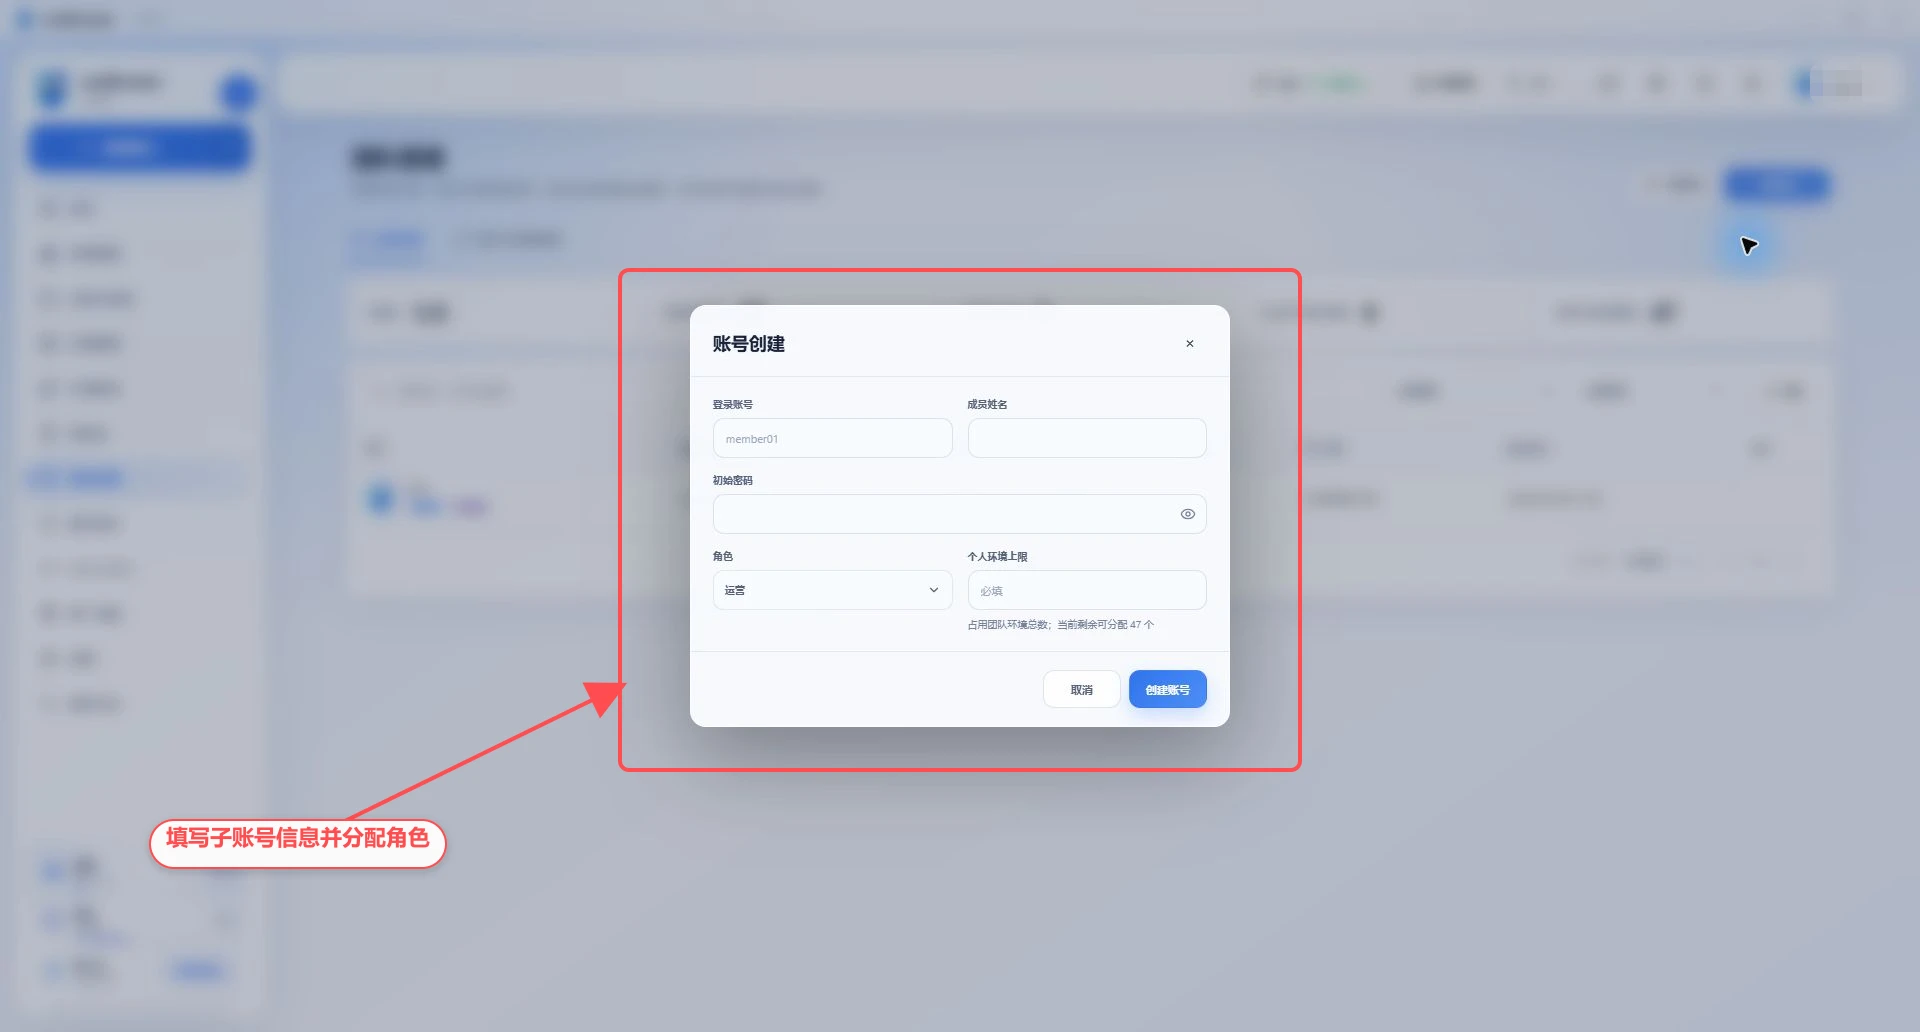
Select "Account Creation";
Enter a 3–48-digit login account using letters, numbers, dots, underscores, or hyphens;
Enter a member name of 1–80 characters;
Set an initial password, which must be at least 10 digits and cannot be the same as the username;
Choose a role;
Set personal profile upper limit;
Click "Create Account";
The login account and initial password are handed over to members through secure channels.
Don't keep your initial password in group chats or public documents for long periods of time. Members should make changes as soon as possible after logging in for the first time.
3. Create members in batches
Click "New Member > Batch Creation";
Enter a 2–40 digit account prefix;
Set the creation quantity, ranging from 1–50;
Set a unified initial password;
Choose character and personal profile caps;
Submit to create.
The system will generate accounts in a manner similar to member01, member02. Confirm the remaining seats, account prefix and password issuance method before creation.
5. Editorial members
Click the edit button in the member row to modify the member's name, role, personal profile limit, and reset the password if you have permission.
Modify role
Select the new role and confirm. The permissions take effect immediately after saving, and members will see the new menu and operation scope the next time they enter the page or refresh the data.
Activate or deactivate members
After deactivating, members cannot continue working as before; re-enabling can restore access. The owner is always enabled and cannot be disabled.
reset password
Team owners can set new passwords for members. The new password must be at least 10 characters long and cannot be the same as the member’s login account. Notify members using secure channels after reset.
6. Create a custom role
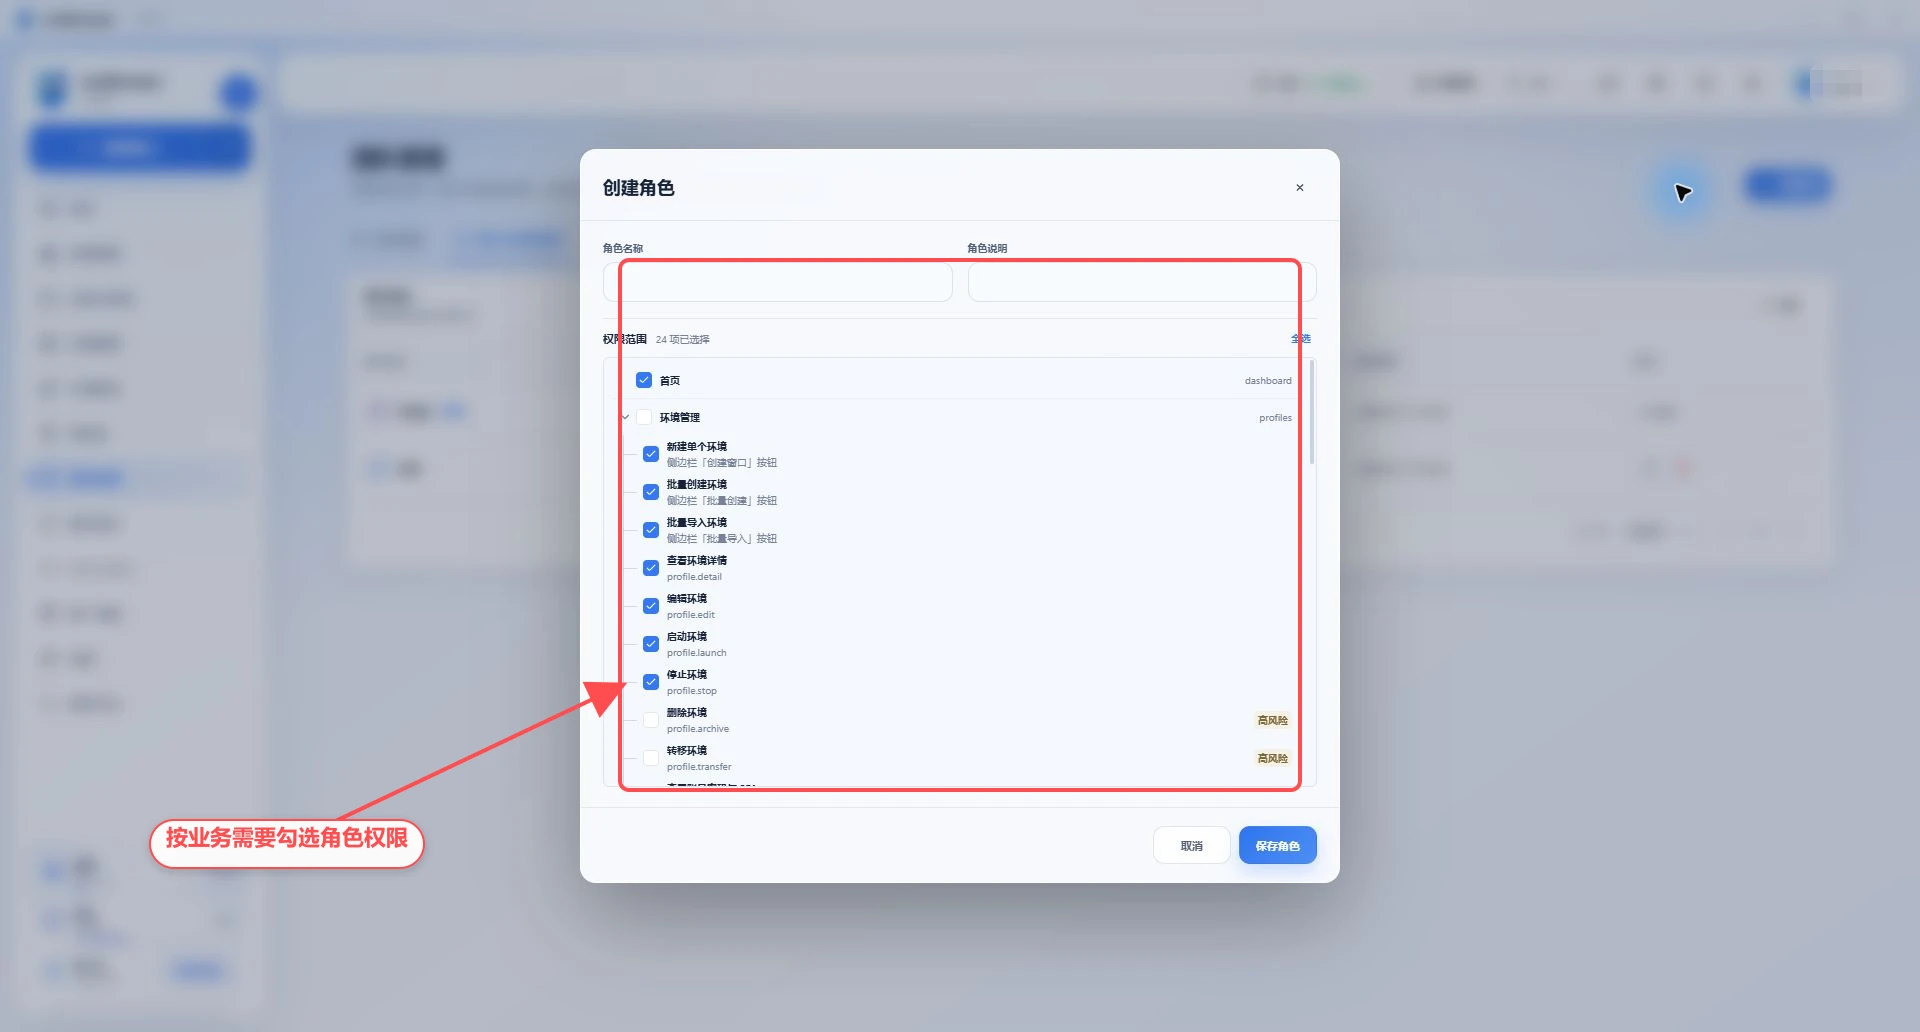
Switch to "Role and Permission Management";
Click "Create Role";
Enter a character name of no more than 40 characters;
You can fill in a role description of up to 200 characters;
Expand the module in the permission scope and check the permission;
Click "Save Character".
Permission entries mark owner-specific, sensitive, or high-risk attributes. When creating a common role, follow the principle of least privilege and do not select all privileges for convenience.
7. Permission configuration suggestions
Establish roles by responsibilities, such as:
profile Operator: View, create, edit, start and shut down profiles;
Proxy administrator: manages and detects proxies, but does not manage members;
Auditors: only view business data and operation logs;
Automated development: use API & MCP and have the necessary profile viewing and launch permissions;
Team Admin: Manage members and common roles, but be careful about granting high-risk deletion permissions.
The menu permissions determine whether the entrance can be seen, and the operation permissions determine whether the actions corresponding to the buttons can be performed. Both should be checked.
8. Delete role
Custom roles that are not used by members or pending invitations can be deleted. If the page prompts that the role is still in use:
Change relevant members to other roles;
revoke or renew an invitation to use the role;
Delete the character again.
System roles or non-editable roles cannot be modified or deleted.
9. Delete members and transfer resources
Deleting a member is an irreversible operation and a resource receiver must be selected first.
Click the delete button of the member row;
Check the number of profiles, groups and proxies owned by this member;
Choose a resource receiver who is still active on the team;
Enter or paste the red member account as required on the page to complete the second confirmation;
Click to confirm the deletion.
After deletion, resources such as the member profile and windows will be transferred to the receiver. Before execution, confirm that the receiver has sufficient authority and profile quota.
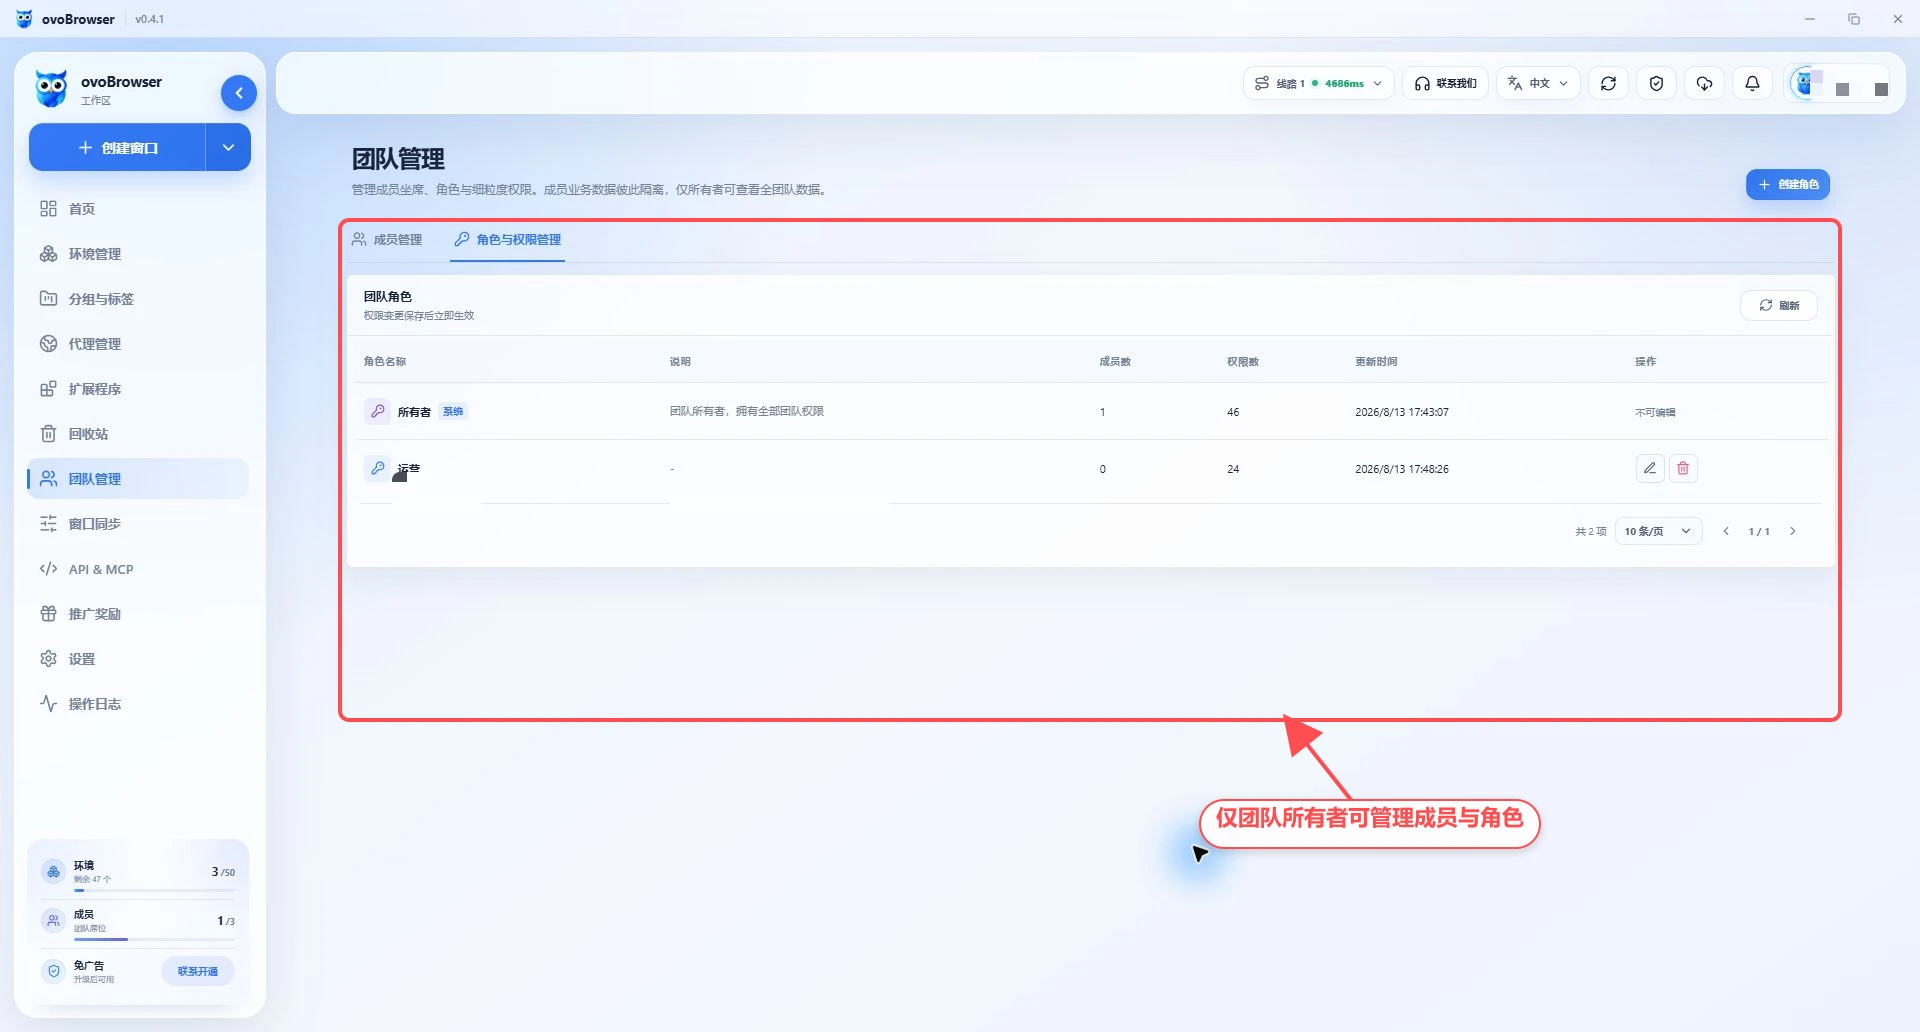
The current workspace only has the team owner and no ordinary members that can be deleted, so the real pop-up window for deleting members cannot be opened. The figure below retains the current "Role and Permission Management" status; before actual operation, you should first confirm that there are deletable members and available resource receivers in the member list.
10. Frequently Asked Questions
There are no roles to assign
Go to "Role and Permission Management" to create a role, and then create members.
When creating a member, it prompts that there are insufficient seats.
Reduce the number to be created, delete members you no longer use, or add team seats.
The personal profile limit cannot be increased
Check the team's total profile quota and the quota that has been allocated to other members. The personal cap cannot exceed the team's allocation range.
Members cannot see the profile
Check the profile resource ownership, role menu permissions and profile viewing permissions. Member business data is isolated by ownership and will not automatically see other member profiles.
The page does not change after the permissions are modified.
Have members refresh their data, re-enter the page, and log in again if necessary. If there is still no change, recheck whether the role has been saved to the member.